About Learn Arduino
Learn Arduino is a browser-based interactive Arduino simulator with 16 written lessons, free and beginner-level. Every lesson wires a real circuit on a 3D Arduino Uno in the browser and runs the actual sketch code, so you can see the LED blink, the motor turn and the sensor read before you buy a single part.
Who makes it
Learn Arduino is written and maintained by Nick Hu, a developer in Shanghai, China. He built the 3D board — an Arduino Uno R3 modelled part by part — and writes the lessons that run on it. The wiring tables you read on the lesson pages are the same connections the simulator executes, which is why a mistake there shows up as a circuit that will not work rather than as a paragraph nobody checks.
How the lessons are written
- One new idea per lesson. Nothing appears that an earlier lesson has not already explained.
- Every sketch compiles for an Arduino Uno R3 and is the same code the simulator executes, not a simplified version.
- Part values — resistor sizes, current draw, sensor ranges, step counts — come from the manufacturer datasheets (ATmega328P, HC-SR04, TMP36, 28BYJ-48, SSD1306) and are quoted in the tables rather than in vague prose. Every lesson ends with a Sources list linking the documents it quotes, so any figure can be checked against the original.
- Where a number depends on your own hardware (soil moisture, light level, force), the lesson tells you to measure yours instead of copying ours.
- Pages are reviewed against the simulator whenever a lesson changes; the “last updated” date at the bottom of each page reflects that review.
What the simulator looks like
These are captures of the site itself, taken at 1440 × 900 with the second lesson open. Nothing is a mockup: the board is the 3D model the lessons run on, and the serial monitor is printing the sketch in real time.
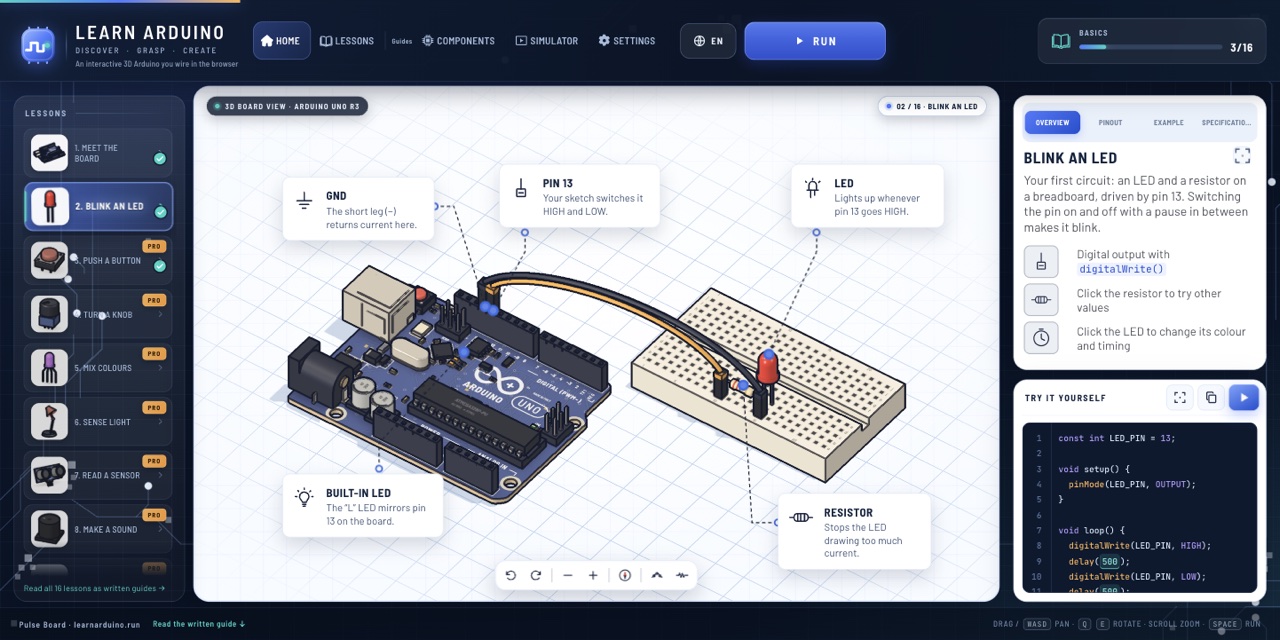
The wiring in the 3D view and the wiring table on the lesson page are generated from the same list of pin connections, which is the one claim this site is built to keep. If a jumper on the board disagreed with a row in the table, the lesson would be teaching two different circuits, and no amount of prose would fix that.
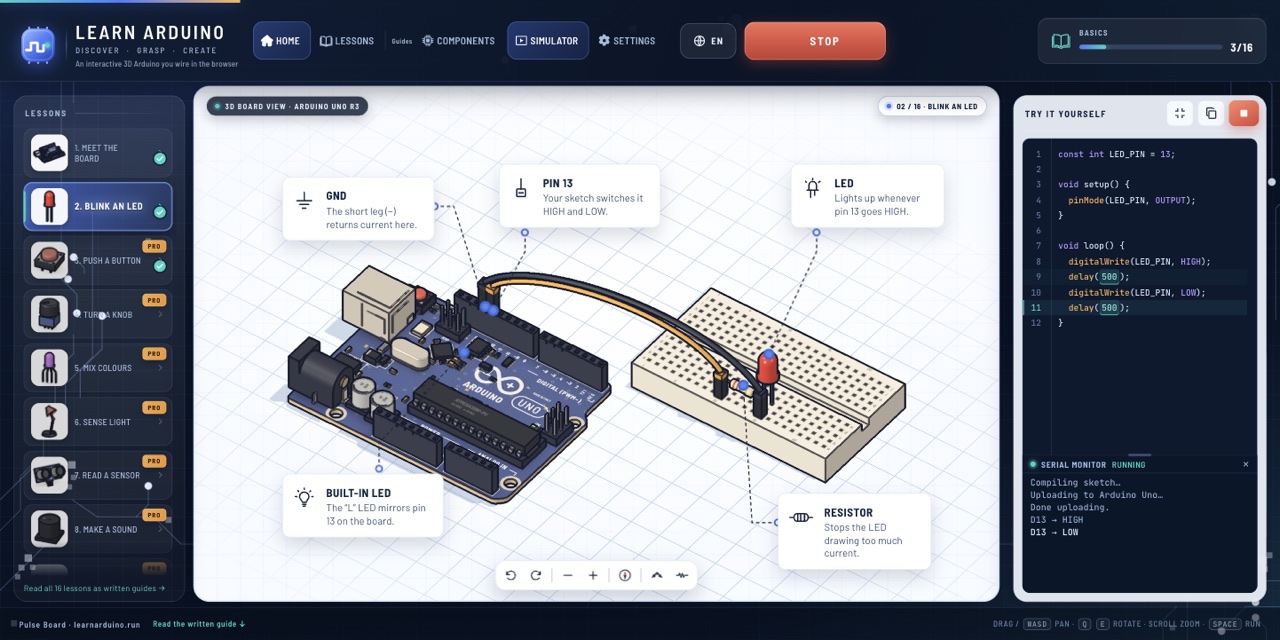
The Arduino simulator page explains what the model reproduces and where it differs from a bench — an ideal 5 V rail, no contact resistance, no sensor noise. Those differences are the reason every lesson ends with a wiring table you can carry to real hardware rather than a screenshot you can only admire.
What you need
Nothing to start: the whole course runs in a browser with WebGL. To build along on a desk you need an Arduino Uno R3, a breadboard, a handful of LEDs, resistors, a push button, a 10 kΩ potentiometer, an LDR, a piezo buzzer, an HC-SR04 ultrasonic sensor, a TMP36, an SG90 servo, a 28BYJ-48 stepper with its ULN2003 board, and a capacitive soil moisture sensor with a 0.96″ OLED. That is one common starter kit plus two extras.
Corrections and contact
Found a wiring error, a sketch that will not compile, or a number that does not match your datasheet? Write to hello@learnarduino.run with the lesson name. Corrections are applied to the page and its “last updated” date the same week.
Start with the board and its pins — it is the reference for every lesson after it.
Lesson 1: Arduino Uno pinoutThis page last updated 19 November 2026.