Lesson 9 of 16 · 30 min
Build an Arduino Piano with Eight Buttons
An Arduino piano uses eight buttons on pins 2–9 with INPUT_PULLUP, one piezo buzzer on pin 10, and an array of note frequencies so each key plays tone() at its own pitch.
This lesson also runs on an interactive 3D board: wire it, press Run and watch the circuit respond.
Open the 3D lessonEight keys, one octave, one buzzer. Each button connects its pin to ground, and the Uno’s internal pull-up holds the pin HIGH until you press. That is the whole input circuit — no resistors, no power rail on the breadboard.
Because a pressed key reads LOW, the sketch scans all eight pins, finds the one that is down, and plays the matching frequency from a second array. Two arrays in the same order is the trick: key i always plays NOTES[i].
What you need
| Part | Qty | Notes |
|---|---|---|
| Arduino Uno R3 | 1 | Pins 2–9 for keys, pin 10 for sound |
| Tactile push buttons | 8 | 6 mm or 12 mm, one per note |
| Passive piezo buzzer | 1 | Active buzzers cannot play a scale |
| Breadboard + jumpers | 1 | Full-size board fits eight keys comfortably |
How to wire it
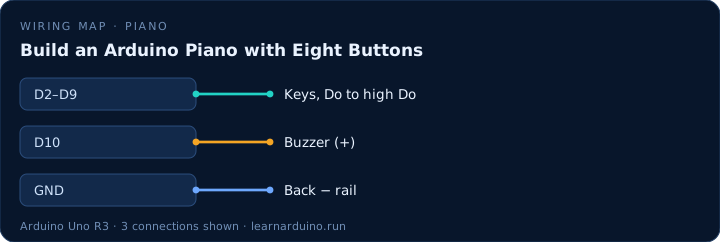
Each key: one leg to its own pin (2 through 9), the other leg to the ground rail. Buzzer + → pin 10, buzzer − → GND. The ground rail carries every key and the buzzer.
| Pin | Connects to | What it does |
|---|---|---|
| D2–D9 | Keys, Do to high Do | Pulled up inside the Uno: LOW while the key is down. |
| D10 | Buzzer (+) | <code>tone()</code> plays the note here. |
| GND | Back − rail | The other leg of every key, and the buzzer’s (−). |
Building a playable Arduino piano
Eight keys, eight pins, no resistors. Each button connects its pin to ground and INPUT_PULLUP holds it HIGH until pressed. The loop reads all eight, remembers which one is down, and calls tone() only when that answer changes — calling it every pass restarts the note hundreds of times a second and turns the scale into a buzz.
The limit is polyphony. tone() plays exactly one square wave, so pressing two keys plays whichever the scan finds last. That is fine for a melody and wrong for chords: chords need a DAC and an amplifier, or a module that accepts note messages over serial.
Key feel, latency and the next step
Latency is one pass of the loop. Eight digitalRead() calls take microseconds, so the delay you feel comes from the debounce and from whatever else the sketch does. Add an OLED or serial logging outside the key scan, or the piano starts to feel sticky.
Twelve keys fit on pins 2–13 with one pin left for sound. Beyond that, a resistor ladder on a single analog pin reads five or six buttons by voltage, which is how small MIDI controllers do it. Recording and playback is two arrays of note and timestamp — watch the 2 KB of SRAM on an Uno before you record a whole song.
The sketch
const int BUZZER = 10;

// one pin per key, lowest note first
const int KEYS[]  = { 2, 3, 4, 5, 6, 7, 8, 9 };
const int NOTES[] = { 262, 294, 330, 349, 392, 440, 494, 523 };
const char* NAMES[] = { "C", "D", "E", "F", "G", "A", "B", "C2" };

int playing = -1;  // key sounding now, -1 for silence

void setup() {
  Serial.begin(9600);
  for (int i = 0; i < 8; i++) {
    pinMode(KEYS[i], INPUT_PULLUP);  // HIGH until pressed
  }
}

void loop() {
  int pressed = -1;
  for (int i = 0; i < 8; i++) {
    if (digitalRead(KEYS[i]) == LOW) pressed = i;  // LOW = held down
  }

  if (pressed != playing) {          // only act on a change
    playing = pressed;
    if (playing >= 0) {
      tone(BUZZER, NOTES[playing]);
      Serial.println(NAMES[playing]);
    } else {
      noTone(BUZZER);                // key released
    }
  }
}
What the code does
- INPUT_PULLUP switches on an internal 20–50 kΩ resistor to 5 V, so an unpressed key reads HIGH and a pressed one reads LOW.
- KEYS[] and NOTES[] are read in the same order, which is why key i plays note i without any lookup table.
- playing remembers the last key so tone() is called once per press, not hundreds of times a second.
- noTone() is what makes the note stop when you lift your finger; without it the last note drones on.
Specifications
| Item | Value |
|---|---|
| Keys | 8 tactile switches, 6 mm |
| Notes | C4–C5 (or C5–C6) |
| Pull-ups | Built in, about 20–50 kΩ |
| Buzzer | Passive piezo on D10 |
| Breadboard | Full size, with power rails |
Common mistakes
- Using an active buzzer. Every key then plays the same pitch, which sounds like a broken piano rather than a scale.
- Calling tone() on every loop pass. The note restarts constantly and comes out as a buzz; only call it when the pressed key changes.
- Wiring all eight keys to one pin. Each key needs its own pin (or a resistor ladder) or the sketch cannot tell them apart.
Sources
The figures in this lesson come from these documents. Every value in the tables above can be checked against them.
- tone() — Arduino language reference
- digitalRead() — Arduino language reference
- pinMode() — Arduino language reference
Frequently asked questions
Can I build an Arduino piano without resistors?
Yes. With pinMode(pin, INPUT_PULLUP) the chip provides the pull-up for each key internally, so the buttons connect straight between the pin and ground.
How many keys can an Arduino Uno piano have?
Twelve comfortably on pins 2–13 with one buzzer pin left over. For more keys, use a resistor ladder on one analog pin or a matrix with diode isolation.
Why does my piano play the wrong notes?
Check the order of the two arrays. If KEYS[] runs pin 2 to 9 but NOTES[] is written from high C down, the scale comes out backwards.
Can I add volume or polyphony?
Not with tone(): it plays one square wave at a time. For chords and volume you need a small amplifier and a DAC, or a dedicated sound module such as the DFPlayer.
Want to see this circuit before you own the parts? The Arduino simulator draws this exact pin table on a 3D Uno R3: click any jumper to see what it carries, press Run and read the serial monitor.
Open the Arduino simulatorPublished 12 November 2026 · last updated 19 November 2026 · written and tested by Nick Hu.