Lesson 12 of 16 · 20 min
Arduino Servo Motor: Wire It and Sweep It
A servo motor holds a commanded angle: on an Arduino you attach it with the Servo library, and servo.write(angle) sends a 0.5–2.4 ms pulse every 20 ms that sets the position between 0° and 180°.
This lesson also runs on an interactive 3D board: wire it, press Run and watch the circuit respond.
Open the 3D lessonA hobby servo is a DC motor, a gearbox and a position sensor in one box. It does not spin freely; it turns to the angle you ask for and holds it there, which is why it is the part behind robot arms, camera gimbals, rudders and dials.
The signal is a pulse train: a 1.5 ms pulse every 20 ms means centre, 1 ms means one end, 2 ms the other. The Servo library generates that in the background, so all your sketch does is call write().
What you need
| Part | Qty | Notes |
|---|---|---|
| Arduino Uno R3 | 1 | Pin 9 sends the signal |
| SG90 micro servo | 1 | 9 g, 0–180°, three-wire lead |
| External 5 V supply | 1 | 4×AA or a 5 V 2 A adapter for a loaded servo |
| 100 µF capacitor | 1 | Across the servo supply, stops reset-brownouts |
How to wire it
Brown → GND, red → 5 V (external supply for anything but a free-moving servo), orange → pin 9. Join the external supply’s ground to the Arduino’s ground. The 100 µF capacitor goes across the servo’s red and brown wires.
| Pin | Connects to | What it does |
|---|---|---|
| GND | Brown wire | Ground. |
| 5V | Red wire | Power for the motor. |
| D9 | Orange wire | Signal: a 0.5–2.4 ms pulse every 20 ms. |
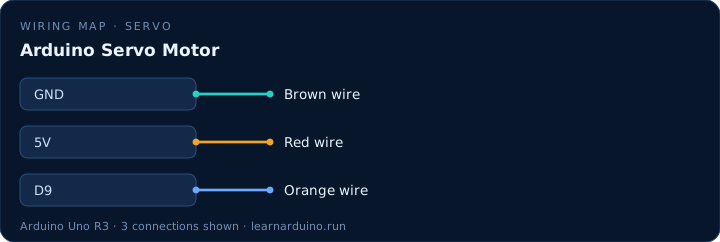
Wiring an Arduino servo motor without brownouts
A servo is a motor with a gearbox and a position sensor, and a stalled SG90 pulls about 700 mA. The Arduino's 5 V pin cannot supply that: the regulator sags, the ATmega resets, and the servo twitches — the classic “my servo reboots the board” loop. Give the servo its own 5 V supply and join the grounds.
The signal wire carries a pulse train, not a voltage level: 1.5 ms every 20 ms means centre, 0.5 ms one end, 2.5 ms the other. The Servo library generates it on a timer, which on an Uno means analogWrite() stops working on pins 9 and 10 — pick different PWM pins if you need both.
Jitter, torque and the 180° limit
Jitter is almost always power. A long thin ground, a shared USB port, or a supply without decoupling lets the servo's current spikes move the reference voltage. A 100 µF electrolytic across the servo leads and a short ground return fix most of it; calling attach() inside loop() causes the rest.
Standard servos travel 0–180° and will grind if commanded past their end stops, so constrain the angle in software. Continuous-rotation servos look identical but read write() as speed, with 90 as stop. For finer control, writeMicroseconds() sets the pulse width directly instead of a rounded angle.
Run the sweep with the horn off before you mount anything. A servo that buzzes at one end is hitting a mechanical stop or a poorly calibrated internal pot, and most cheap SG90s lose 10–15° of usable travel at each end. Clamping the range to 10–170° in software costs nothing and makes the gears last.
The sketch
#include <Servo.h>

Servo arm;                 // one servo object
const int PIN = 9;         // signal wire
const int STEP_MS = 15;    // sweep speed

void setup() {
  arm.attach(PIN);         // start the pulses
}

void loop() {
  for (int angle = 0; angle <= 180; angle++) {
    arm.write(angle);      // position in degrees
    delay(STEP_MS);
  }
  for (int angle = 180; angle >= 0; angle--) {
    arm.write(angle);
    delay(STEP_MS);
  }
}
What the code does
- #include <Servo.h> and Servo arm; create the object; arm.attach(9) starts the pulse train.
- arm.write(90) is an angle, not a speed. The servo moves as fast as it can to get there.
- The two for loops sweep one degree at a time up and back, which looks smooth.
- delay(wait) sets the sweep speed: 15 ms per degree gives a full sweep in under three seconds.
Specifications
| Item | Value |
|---|---|
| Servo | SG90 micro, 9 g |
| Travel | 0–180° |
| Speed | ≈ 0.1 s per 60° |
| Torque | 1.8 kg·cm at 4.8 V |
| Signal | 50 Hz, 0.5–2.4 ms pulses |
Common mistakes
- Powering the servo from the Arduino 5 V pin. A stalled SG90 pulls 700 mA and resets the board — the classic “my servo makes the Arduino reboot” bug.
- Forgetting the shared ground. The signal has no reference and the servo twitches or ignores commands.
- Calling attach() inside loop(). It re-initialises the timer every pass and makes the servo jitter.
Sources
The figures in this lesson come from these documents. Every value in the tables above can be checked against them.
- Servo motors — Arduino documentation
- Servo library — Arduino reference
- Arduino Uno Rev3 — official board specifications
Frequently asked questions
How many servos can an Arduino Uno control?
The Servo library supports up to 12 on an Uno, but the real limit is power: each moving servo needs 200–700 mA, so two or three already need their own 5 V supply.
Why does my servo jitter or reset the board?
Almost always the supply. Move the servo to a separate 5 V source, join the grounds, and add a 100 µF capacitor across the servo leads.
What is the difference between a servo and a stepper motor?
A servo holds an angle within 180° and is closed-loop inside. A stepper rotates continuously in exact steps and can turn many revolutions, but needs a driver and does not know where it is without counting.
Can I control a servo with a potentiometer?
Yes: read the pot with analogRead(), map 0–1023 to 0–180, then write that angle. It is the classic two-part build and needs no extra library.
Want to see this circuit before you own the parts? The Arduino simulator draws this exact pin table on a 3D Uno R3: click any jumper to see what it carries, press Run and read the serial monitor.
Open the Arduino simulatorPublished 12 November 2026 · last updated 19 November 2026 · written and tested by Nick Hu.